How Can We Help?
Sending Email
Here we’ll cover our email marketing capabilities and introduce you to some basic concepts involved with creating and sending campaigns.
As mentioned on the “Campaigns Guide” The Email Campaign is a standard, “sends a regular, one-time email” campaign”. Let’s say you want to send a last-minute email blast to all of your shoppers about a 50% off sale. This isn’t the type of campaign you’ll run regularly, so no need for an automation. You just need to get your message out quickly.
To get started, go to campaigns–> Emails.
Manage Emails
On the main email screen, you can see the email campaigns you previously created. Clicking on the 3 dots next to an email allows you to send or schedule the campaign, edit, preview, copy, organize in folders (“move to category”) or send a test email to see how it looks before sending.
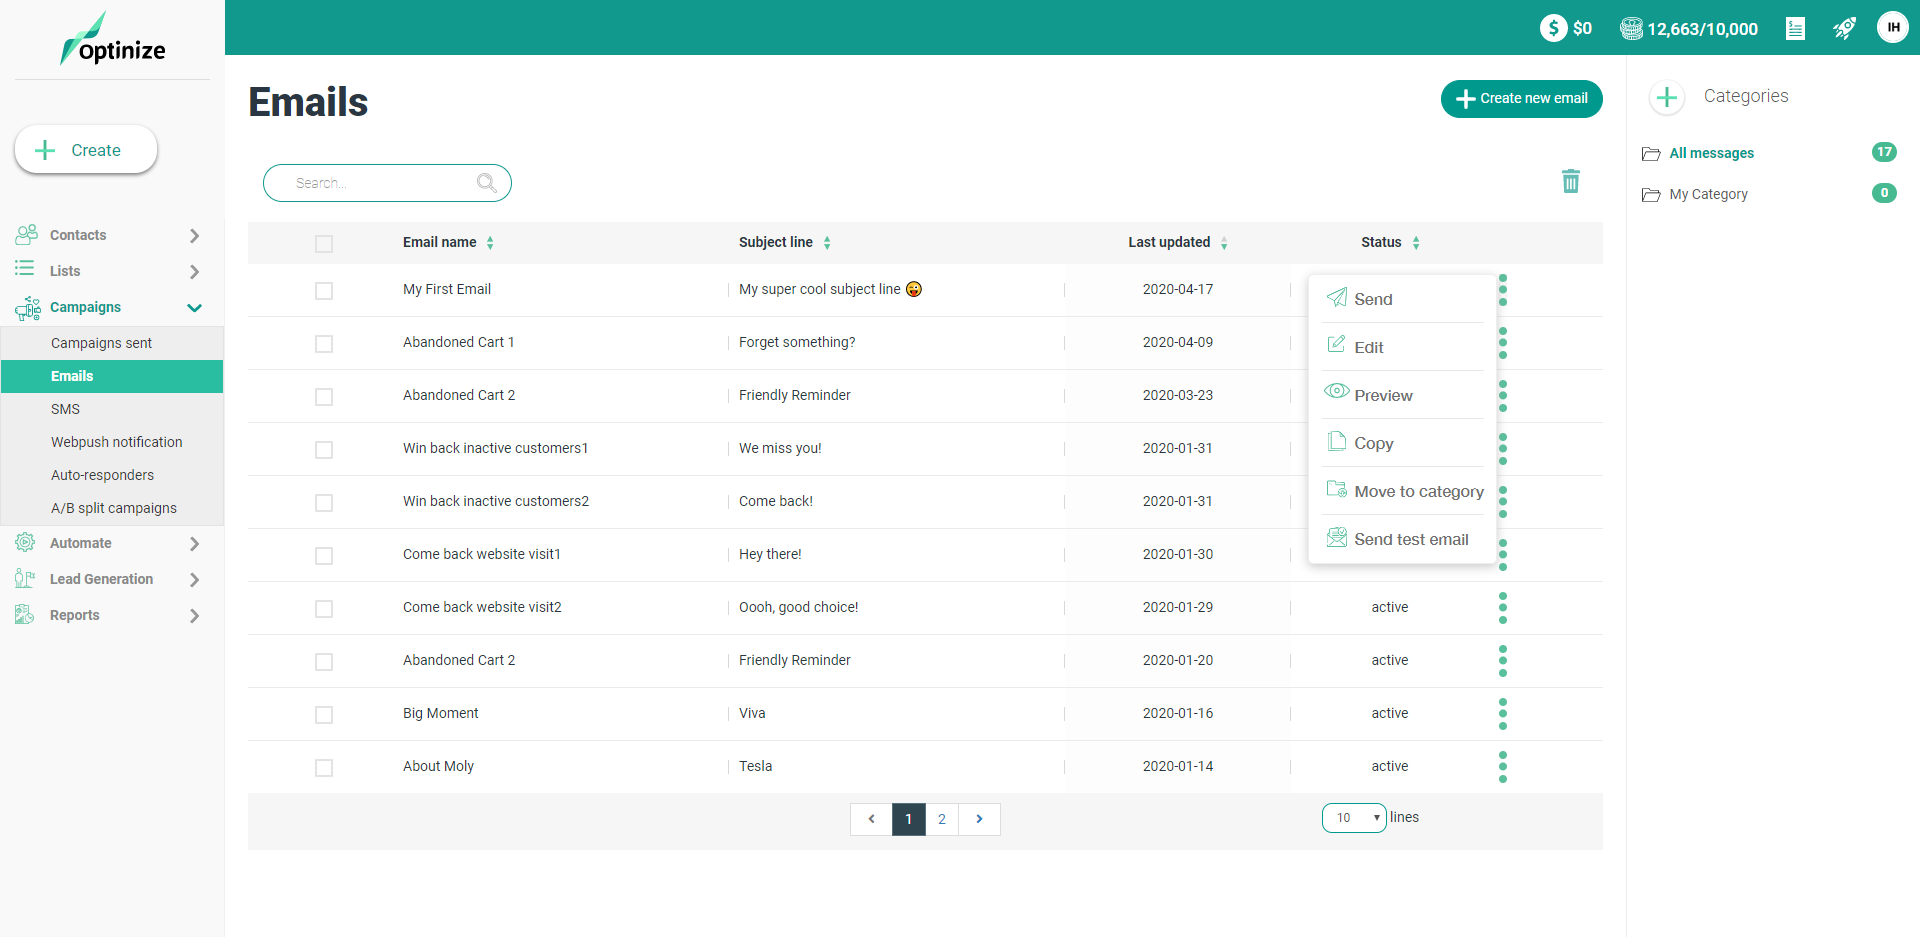
Send – allow you to send an email from your email list.
Edit – allows you to make changes in an email from you list
Preview – clicking the preview button will open pop up with an option to see how your email will look for desktop and mobile users.
Copy – let you duplicate an existing campaign.
Move to category – This is where you can organize your emails. See category as s ‘folder’ that you can place your files in. You can create categories, fill them with emails and easily access them from the right sidebar.
Send test email – we encourage you to send at least one test email before sending any email. Follow the steps below and make sure your email is setup properly before sending.
Creating a new email
The very first step when you are beginning any email campaign is to provide the email name, sender name and email address, as well as the email subject line and pre-header and also select the list/segment of people to whom you are sending your email. You can always change this later, if you’d like.
Just in case you are not familiar with the terms (if you are, feel free to skip this part):
- Email Name is for you to easily understand what’s the email about.
- Sender Name is the from name that appears on the email so that customers can understand who is this email from.
- Sender Email address is the from email address that your customers can reply to. If you wish to use a different reply email address, click the icon next to the sender email and insert the reply email address you wish to use.
Note: sender email must be verified in order to be used on an email campaign. To verify your sender email address, type your email address and click “add new email”. An email will be sent to that email address, click on the verification link and you are Good-to-Go.
- Email subject line is where you type in your subject line, you can add emojis and personalization fields like customer’s name to increase open rate.
- Pre-header is the short summary text that follows the subject line when viewing an email from the inbox. Many mobile, desktop and web email clients provide email preheaders to tip you off on what the message contains before you open it.
- List/segment is where you set to whom this email campaign will be sent. You can easily target a subset of contacts within your larger list if you’d like to send a particular message pertinent to their interests.
Note: All pre-existing segments will display via the drop down by default. These segments are created using the Advanced Search under the Contacts page.
Once finished, click on the “next” button at the bottom of the screen.
On the second step, you’ll reach the Templates screen. Here you can select from the many pre-designed emails from Optinize, labelled by how they can be best used. From a welcome email to a webinar, or a contest to a discount, there are many templates you can quickly personalize to meet your needs. You can also easily build an email from scratch, using your own images.
Once in the email builder, it’s easy to create an email for your contacts. After it’s complete, you’ll be able to review the Campaign Summary, including your subject line, selected lists, and other options as relevant. You can also send a test email, or preview the email in an email client or desktop preview.
The Campaign Summary will let you know if you have any last-minute issues to resolve. You can select “Save & Exit” if you’d like to return to your campaign later, Or, simply click “Send Now” to send your email campaign!