How Can We Help?
Automation Guide
In this guide we’ll cover the specifics of how the automation builder works. By the end, you should be feel comfortable using the builder to create automations by combining triggers and actions.
The automation library
We’ve created a variety of automation workflow recipes you can use as a starting point. You can build on top of these workflows and customize them to what makes sense for your business.
If you just want to create a new automation, first click “automate” on the left side menu to navigate to “my automations” screen. Then click the “Create new automation” button in the upper right-hand corner.
Naming your automation
Usually it’s a good idea to be descriptive of what the automation does rather than being terse or vague because managing your automations can become confusing when you have quite a few.
Take the time and add a description it will sure help everyone in your company to understand what is the automation about.
Automation trigger
Automation triggers are the conditions that, when met, begin automations. When you create a new automation, you’ll be asked to pick a trigger immediately after giving it a name. You add a trigger by clicking it. If you aren’t sure yet what you want the trigger to be, you can click the “x” in the upper right-hand corner.” You’ll have the option to remove or add triggers at any point in time later on.
Segment contacts entering the automation is a useful option that allows you to target specific contacts by filtering them. You create a segment so that only the contacts who match your segment will enter the automation.
For example, if you only wanted an automation to run for contacts who haven’t yet made a purchase, you could create a segment that looks for the “prospect” tag or looks for the absence of the “customer” tag. If you placed your site tracking and events or use Shopify integration you can simply set “has purchase online=0”.
You should be careful when creating the automation trigger because a contact could receive the same message over and over each time they do something. For instance, if the trigger is “Opens email,” the automation would run each time an email is opened by a contact. To solve it, we recommend adding count and/or time filters to the automation trigger.
Adding actions
You can add actions to your automation from the sidebar. The sidebar is the light grey column to the far left of the automation builder. You can minimize or expand sections on the sidebar by clicking the arrows in the top right of the element categories. To place an action at a specific spot of your automation, you click and drag it to the node you want it to appear on. When you release the click, you will be presented with the action options modal window.
NOTE: if this is your first time building an automation or you are not sure about Optinize terminology, don’t worry, there’s a “Automation Actions Explained” section later on this guide.
Removing triggers and actions
To delete triggers and actions you hover over it and click the delete icon that appears in the upper right-hand corner.
If you remove an element that has actions after it, make sure you connect the other elements again.
Saving your automation
As you work, make sure you click the “save” button to save your work. You can also click on “save& exit” and continue the automation later.
Viewing your workflow
If you are creating a large automation, it might not be possible to view the entire workflow within your browser window. In that case, you have two options:
- You can scroll the window vertically and horizontally. To focus on the area of interest, you can click & hold the “Space” button and scrolling up & down and left & right while holding the mouse left button.
- You can zoom in and out. To view more of the workflow in your browser, you can click & hold the “Ctrl” button and scrolling up & down.
- However, we recommend creating multiple, smaller automations instead of one, large automation as a best practice.
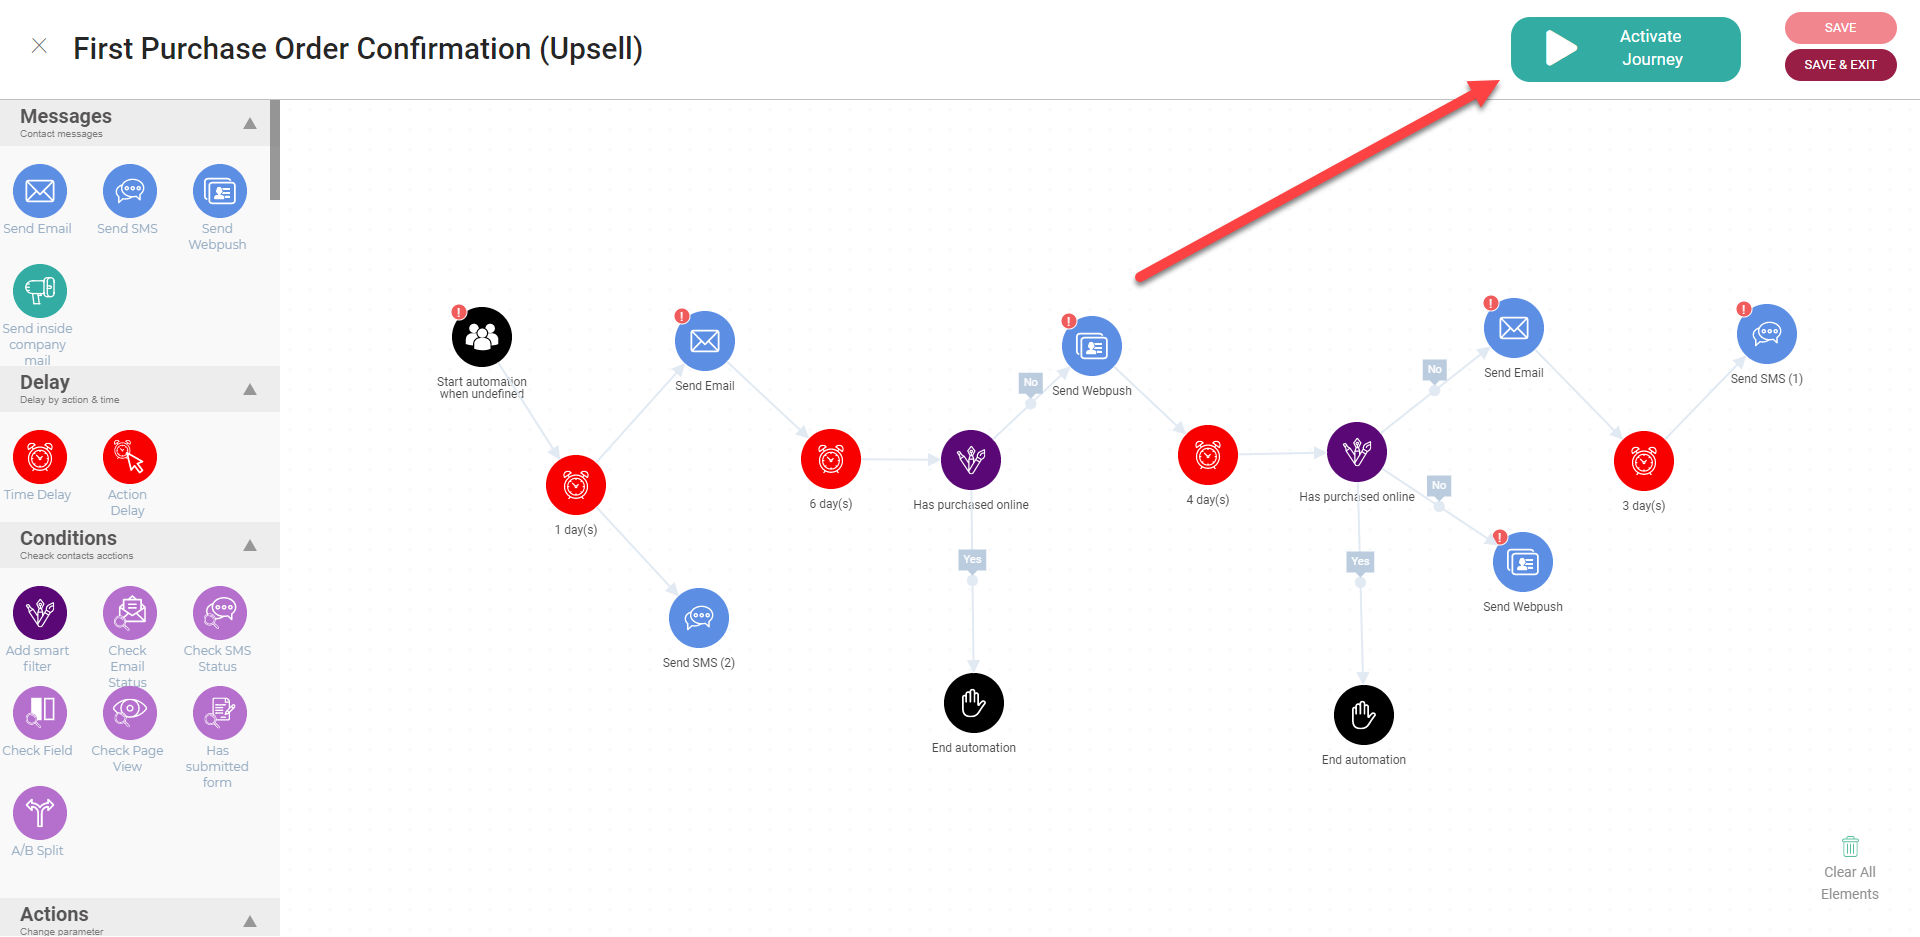
Activating your automation
It is a good idea to keep your automation inactive until it is complete. Once it is active, contacts can start entering into it by triggering the start conditions.
There are two ways to change the status of an automation from inactive to active (and vice versa):
1. From the “My Automations” overview page
The “My Automations” overview page is the page you see after clicking the “My Automations” on the leftside menu. You will see a list of the automations you’ve created, Automation Stats, and an Edit button by clicking the 3 dots drop-down menu.
Clicking the automation status dropdown will provide more options: Active/Pause/Draft.

2. From the Automation Builder
You will see an activate/pause button on the top right of the automation builder. To make an automation active click “Active.” To make the automation inactive, click “pause.”
Editing your automation
When making changes to an automation after you have made it live, such as adding and/or removing actions, make sure to switch the automation from “Active” to “Inactive” on the top right of your screen. This pauses the automation while you make your desired changes so contacts won’t skip steps and/or end the automation prematurely. Once changes are complete, you can switch back to Active status and contacts will resume at their respective steps within the automation.
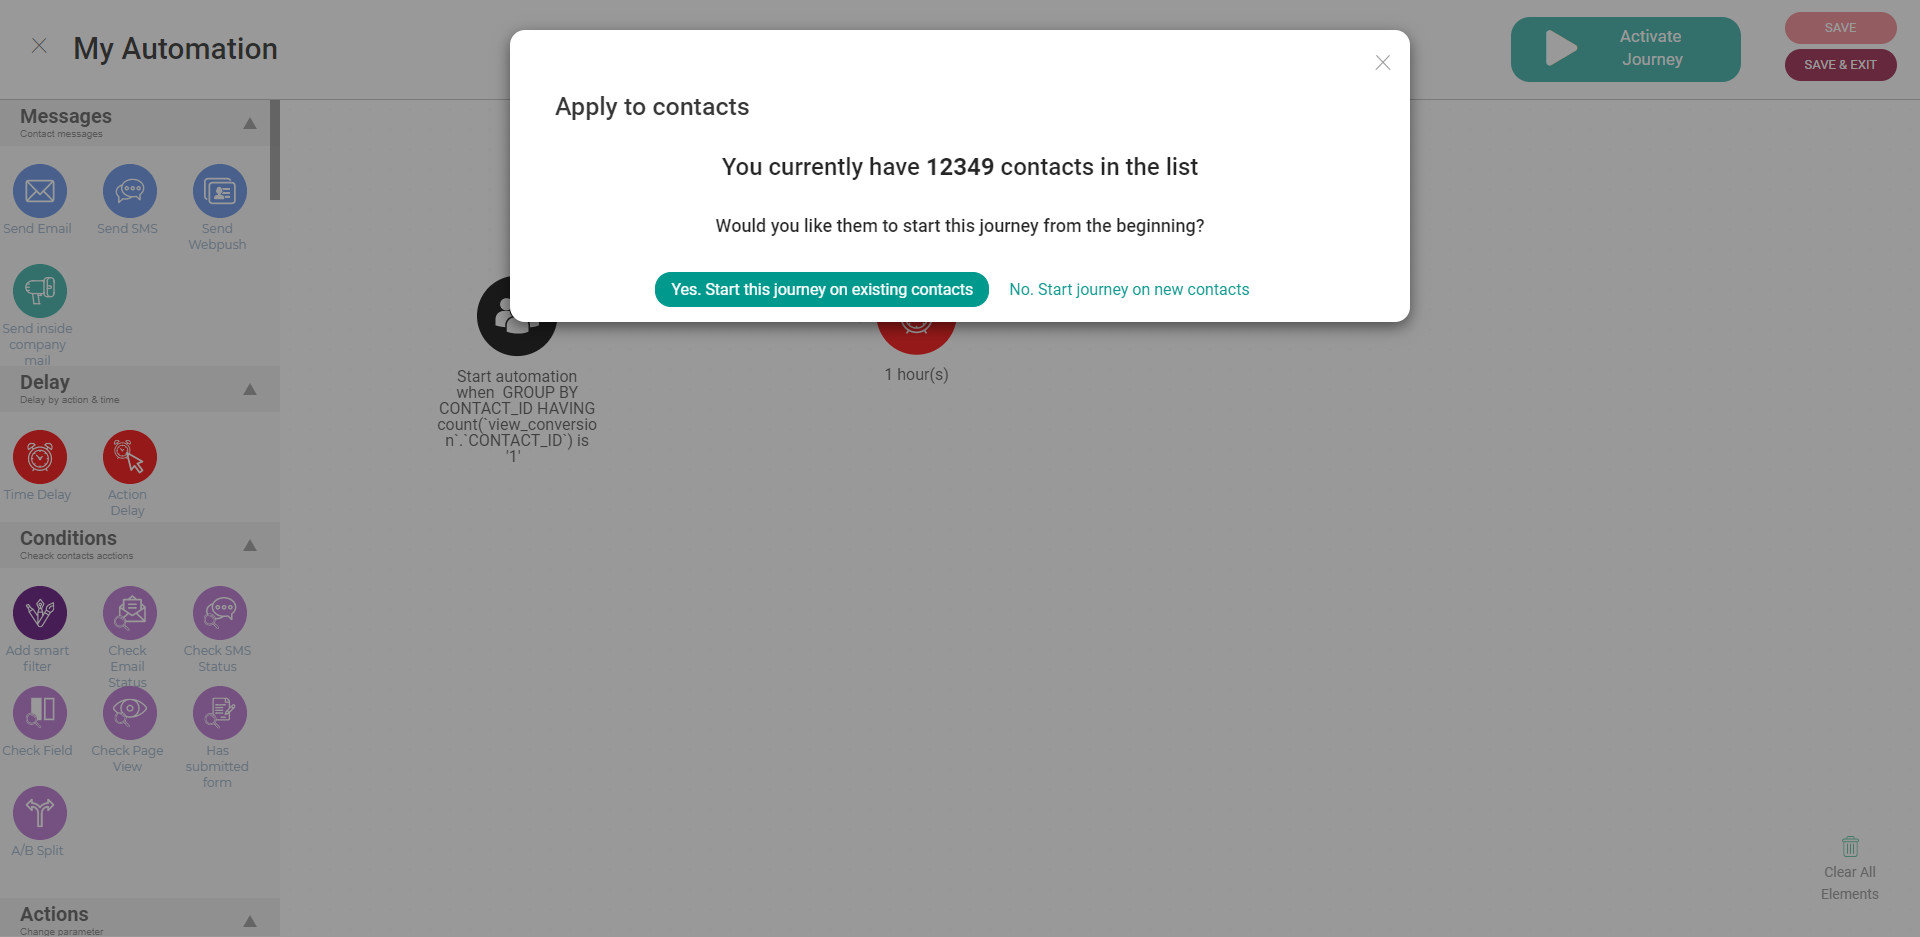
When activating an automation, you’ll be presented with two options
- Start this journey on existing contacts will start this automation on all existing contacts that match your automation trigger.
- Start journey on new contacts will start this automation on new contacts that match your automation trigger.
Automation actions explained
Actions are a series of processes that a contact proceeds through once they enter your automation. As a contact encounters each action in their automation path, the action is executed. Actions can be external. For example, you can use actions to communicate with your contacts via email, SMS, or web push. They can also be internal. For example, you can use actions to update a team member or send a webhook, verify phone number, or add/remove a tag to the contact.
In this article, we’ll explain each automation action and share examples of how you can use them.
Messages
You can use actions in this category to send messages.
“Send email”
This action will send an email to the contact who goes through this step of the automation. You are able to design the email. You are able to time the email by placing a wait condition before it.
“Send an SMS”
When a contact reaches this action in your automation, a text message will be sent to them.
“Send web push”
This action lets you send web push notification to an opted-in contact. You may want to use this to display information about a new offering or a coupon code for a product to get your contact to complete a purchase.
In order to use this feature, you must have site tracking & web push installed and enabled on your site.
“Send inside company mail”
This action sends a notification email. It could notify someone within your company.
Delay
The delay action pauses the automation for the contact at this step. You are able to specify how long they wait before proceeding to the next action in their automation path.
There are two types of wait actions that you can create:
Time Delay
Contacts will wait in this action for a period of time you specify, then proceed to the next action in the automation.
Action delay
Contacts will wait in this action until certain conditions are met, for example, until they perform a certain behavior or until you collect certain information about them.
Conditions
“Smart Filter”
A “Smart Filter” condition creates a fork in your automation. There are two paths in this fork: A “Yes” path and a “No” path. The “Yes” path is for contacts who match the conditions you define and then “No” path is for contacts who do not match the conditions. “Smart Filter” conditions are created with the segment builder. This action is useful for treating contacts differently depending on a variety of factors. You are able to create conditions based on any condition that you can create a segment with: actions, tags, custom fields, Site & Event Tracking data, and other contact data.
“Check email status”
The “Check email status” condition allows you to check contact’s behavior on a specific email. For example, you can check whether or not a contact has opened an email before sending a higher offer to encourage him to complete a sale.
“Check SMS status”
The “Check SMS status” condition allows you to check contact’s behavior on a specific SMS message. For example, you can check whether or not a contact has clicked on a link on the SMS, if not, it’s a good idea to send a higher offer to encourage him to complete a sale.
“Check Field”
This condition checks a value of a custom deal field. You can use this action to automatically match a between data from other systems to the data in Optinize. For example, you can check if a contact made an offline purchased that was updated directly in your CRM.
“Check Page view”
The “Check Page view” condition allows you to check if a contact has visited your website or a specific page. For example, if a contact visited your “help center”, it’s a good idea to reach out with an automated email offering some useful information.
“Has submitted a form”
This action checks if a contact submitted a specific form. If he didn’t, you should consider adding an email action to send a short reminder that the form wasn’t submitted yet.
“A/B Split”
The “Split” action allows you to create split test automations.
A traditional A/B split test that determines a winning path. There are two paths in this fork, set the percentage of which the contacts will split on the different paths.
Actions
This category of actions gives you a variety of actions related to managing contacts.
“Subscribe to a list”
The “Subscribe” action adds a contact to a list.
“Unsubscribe from a list”
The “Unsubscribe from a list” action removes the contact from a list. For instance, when a new customer makes an order, you could remove them from your “prospect” list and, using the “Subscribe” action, add them to your “customer” list.
“Update a field”
This action updates the value of a custom deal field. You can use this action to automatically enter a new value or clear the value for the custom deal field.
“Tag Editor”
Inside the tag editor you have two options:
“Add tag” action will apply a tag to a contact when they reach this step.
“Remove tag” action will remove a tag from a contact when they reach this step.
“Send to Webhook”
The “Webhook” action can send a webhook to another app allowing you to automate actions with apps outside of Optinize. For instance, you could send a webhook to have a support account created with your helpdesk software when a new order comes in.
To use webhook you’ll need to set it up first. Go to settingsà custom integrations and add the integration as you please.
“End automation”
The “End automation” action is an indication that the automation ends at this point. Even without the “End automation” action, your automation would still end when your contact reaches the last step of the automation. This action is more a “note” that there are no more steps for the contact to take in your automation.